
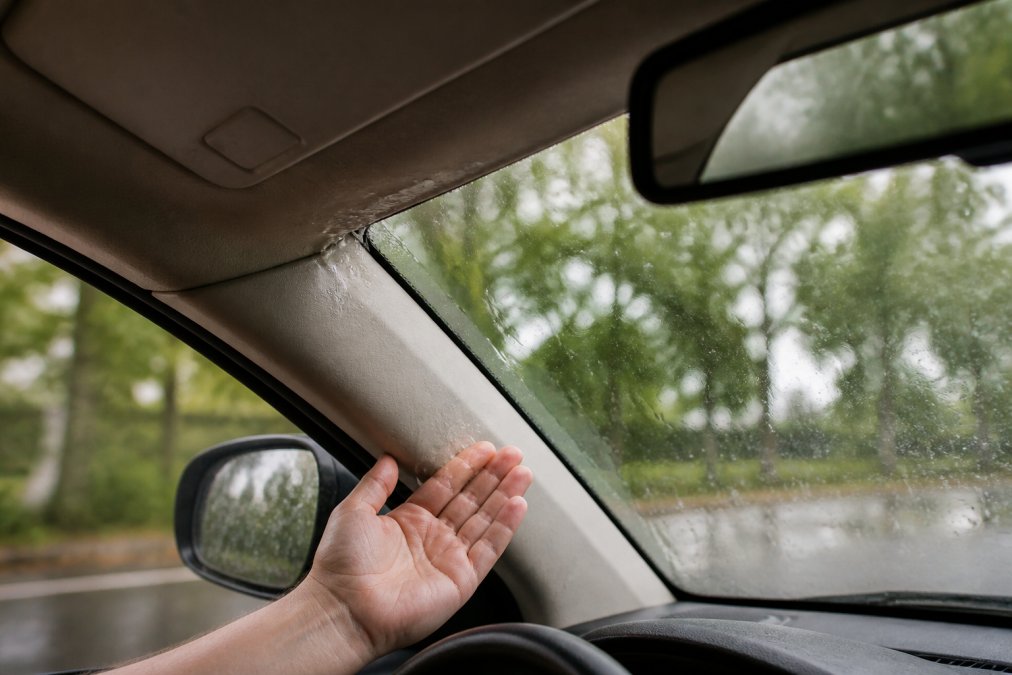
 how-to
Why Windshield Leaks After Replacement Service
Table of Contents
- Common Causes of Windshield Leaks After Replacement
- Understanding Windshield Replacement Cure Time
- Signs of Poor Windshield Installation
- How to Perform a Windshield Water Leak Test
- Risks of Driving With a Leaking Windshield
- What to Do If Your Windshield Leaks After Replacement
- Conclusion
Last Updated: August 27, 2026
Common Causes of Windshield Leaks After Replacement
A windshield leak after replacement usually points to one of three installation failures: improper sealant application, incorrect urethane bead placement, or structural issues with the vehicle's body seams. At BL Auto Glass, we've analyzed hundreds of leak complaints and found that most trace back to preventable mistakes during installation. The good news: most leaks are fixable and fall under warranty coverage.
Insufficient or Uneven Sealant Application
The urethane adhesive seals your windshield to the vehicle body. If the technician applies too little sealant or applies it unevenly around the perimeter, water finds its way through gaps. The sealant bead should form a continuous, uniform line approximately 3/8 inch wide around the entire windshield frame (nhtsa.gov). Thin spots become weak points where water pressure forces moisture through the seal, even if the gap is microscopic.
Improper Urethane Bead Placement
The urethane should be positioned on the pinch weld (the metal edge where the windshield frame sits) and along the body seam, creating a complete moisture barrier. If the bead is placed too far inward or outward, it leaves exposed gaps. Some technicians apply sealant on top of the glass rather than on the underlying frame, creating a false seal that fails under pressure. Poor bead placement often happens when technicians work too quickly or lack proper training on the specific vehicle model.
Body Seam and Pinch Weld Failures
Sometimes the leak isn't the windshield's fault. If the vehicle's body seams are compromised, rusted, or misaligned, the windshield can't form a proper seal regardless of installation quality. Rust on the pinch weld prevents urethane from bonding effectively. A pre-installation inspection should examine the pinch weld and body seams before removing the old windshield. If corrosion is present, it needs to be addressed first. Applying primer to the pinch weld helps the urethane bond better, but severe rust requires repair or replacement of the affected metal.
Understanding Windshield Replacement Cure Time
The windshield isn't fully sealed the moment installation finishes. Urethane adhesive requires time to cure, and there's a critical difference between when you can drive the car and when the seal is actually strong.
Curing Time vs. Drive-Away Time
Drive-away time is typically 1-2 hours, meaning you can drive without the windshield shifting or falling out. Curing time is much longer, usually 24 hours for full strength. During those first 24 hours, the urethane is still hardening. Water pressure from rain, car washes, or highway speeds can stress an incompletely cured seal and force moisture through gaps. Many people don't realize this distinction and immediately drive through a car wash or get caught in heavy rain, causing water intrusion before the seal develops full strength.
How Temperature Affects Curing
Cold temperatures slow urethane curing significantly. In winter or on cool days, the 24-hour cure time extends. Humidity also plays a role, urethane is a moisture-curing adhesive, meaning it hardens when exposed to moisture in the air. Low humidity slows the process; high humidity speeds it up. This is why installation conditions matter; a technician working in dry conditions might need to allow extra curing time.
Signs of Poor Windshield Installation
Not every leak shows up immediately. Some develop over weeks or months as the seal degrades or the adhesive fails to fully cure.
Visual Indicators of Installation Failure
Look for gaps between the windshield and the trim, visible sealant that's cracked or peeling, uneven spacing between the glass and the frame, or a windshield that appears to shift slightly when tapped. The trim should sit flush against the glass with no visible gaps. Discoloration or white residue around the seal can indicate primer wasn't applied or that the urethane is failing. A milky or cloudy appearance in the sealant suggests moisture is getting into the bond.
If you notice wind noise around the windshield area, especially at highway speeds, the seal isn't complete. Air leakage often accompanies water leakage.
Interior Damage and Moisture Buildup
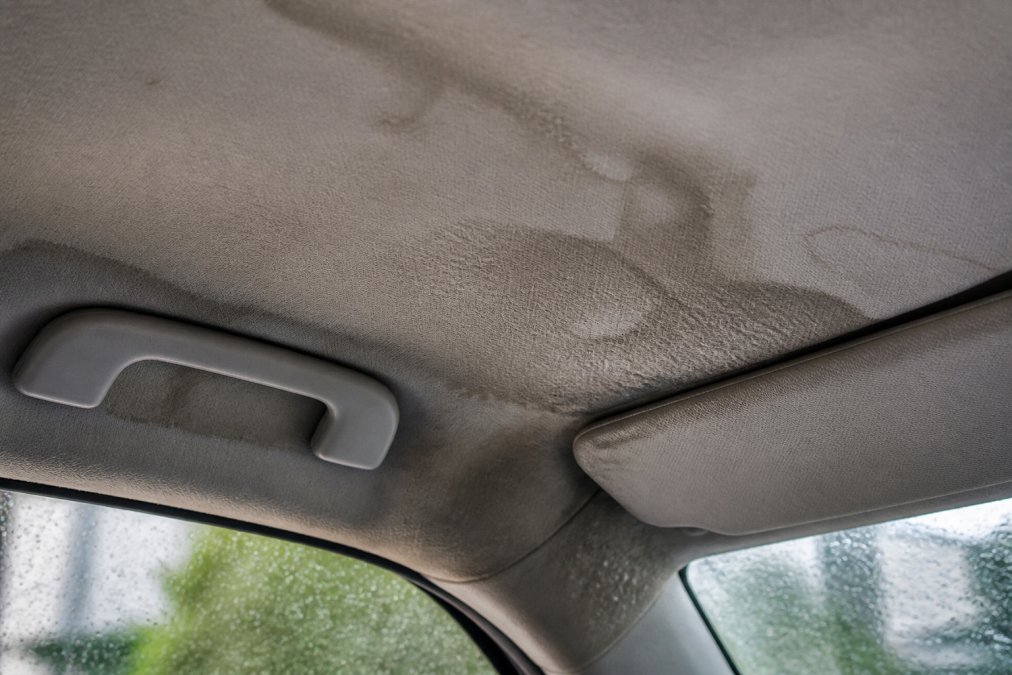
Water staining on the headliner is the most obvious sign. Dark spots or streaks directly above the windshield indicate water has been running down the inside. Check the door panels too, if the lower edges feel damp or show rust stains, water is pooling inside the vehicle.
Musty odors are another indicator. Moisture trapped inside creates an environment for mold and mildew. If your car smells damp even after the weather clears, a leak is likely present. Fogging on the inside of the windshield that won't clear indicates moisture trapped in the seal itself.
How to Perform a Windshield Water Leak Test
If you suspect a leak but aren't sure where it's coming from, you can perform a simple diagnostic test to identify the exact location before contacting a technician.
The Soapy Water Test Method
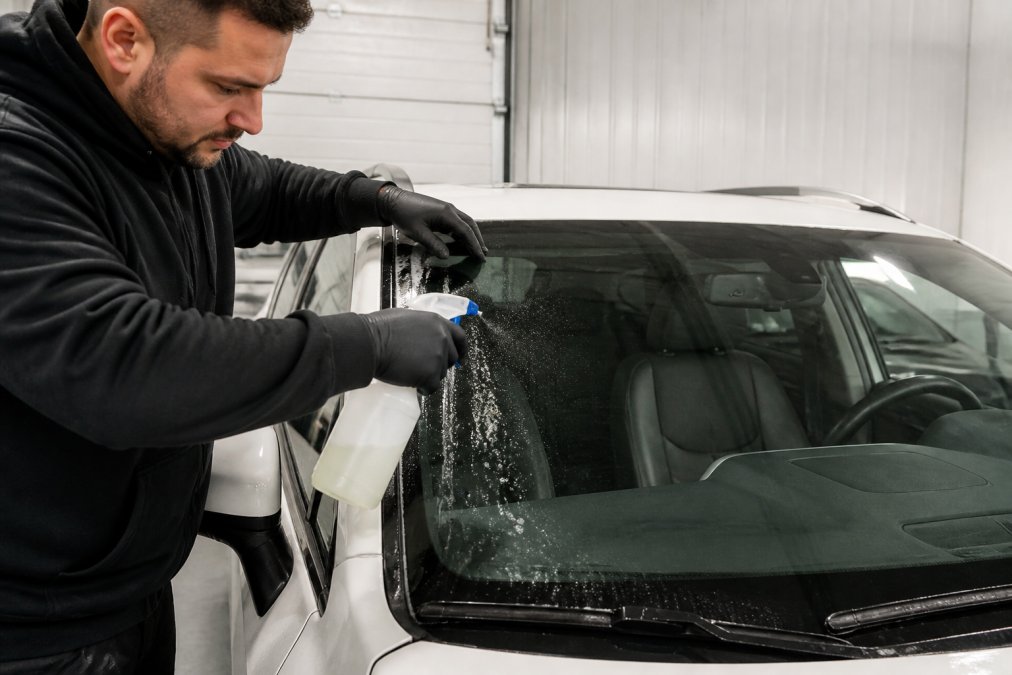
Mix water with a small amount of dish soap in a spray bottle. On a dry day, spray the soapy water along the entire perimeter of the windshield, paying special attention to corners and where the trim meets the glass. Have someone sit inside watching for drips or water entering the vehicle. Spray methodically, section by section, to pinpoint exactly where water is getting in. When you find the leak, bubbles will form on the outside and water will drip inside.
Advanced Leak Detection Techniques
Professional technicians use more sophisticated methods. The Equalizer Ultrasonic Leak Detector sends inaudible sound waves through the vehicle's structure. When sound waves hit a leak, they change frequency, and the technician hears the variation through a receiver. This method works for leaks that are hard to find visually and is particularly useful when water enters through body seams rather than the windshield seal itself.
Water leak detecting paint is another option. This aerosol coating changes color when it contacts water, turning blue-green on contact. Spray it on the suspected area, then simulate rain or use a pressure washer. The color change shows exactly where water is entering.
Risks of Driving With a Leaking Windshield
A leaking windshield poses real safety and financial risks that worsen the longer you wait to address it.
Water inside the vehicle creates structural problems. Moisture trapped in door panels, floor pans, and wall cavities promotes rust formation. Once rust starts, it spreads and weakens the vehicle's structural integrity. Fixing rust damage costs significantly more than fixing a windshield leak. Electrical systems are also vulnerable, water reaching wiring harnesses or module connectors can cause shorts or complete system failure.
Mold and mildew growth is inevitable. Moisture in enclosed spaces creates ideal conditions for mold spores to thrive. From a safety perspective, a compromised windshield seal reduces structural rigidity. The windshield is a structural component that contributes to roof strength and protects occupants in a rollover. Additionally, water on interior surfaces reduces visibility and can create electrical hazards.
Insurance and resale value suffer too. Water damage history and rust issues significantly reduce resale value, and insurance companies may deny claims if the windshield leak was pre-existing and not properly documented.
What to Do If Your Windshield Leaks After Replacement
The steps you take immediately after discovering a leak determine your options and chances of getting it fixed at no cost.
Documentation and Warranty Claims
Document everything. Take photos and video of water staining, moisture, and any visible damage. Write down the date you first noticed the leak, weather conditions, and specific circumstances. This documentation is essential for a warranty claim.
Most windshield installations come with a workmanship warranty covering leaks caused by improper installation for 12 months or longer. Some warranties, like the lifetime warranty offered by BL Auto Glass, cover workmanship defects indefinitely. Check your receipt or contact the installation company to confirm coverage.
Contact the glass company immediately. Describe the leak, provide your documentation, and request an inspection. Many companies will re-seal the windshield at no charge if the leak is due to installation error. Keep records of all communications, emails, phone calls, dates, and names of people you spoke with.
Consumer Rights and Legal Options
If the glass company refuses to honor the warranty, you have legal options. Under consumer protection laws, products and services must be fit for their intended purpose. A windshield that leaks fails this standard. You may be entitled to repair, replacement, or a refund.
Small claims court is an option if the repair cost is within your state's small claims limit. Gather your documentation, photos, receipts, repair quotes, and communications with the glass company. If the damage extends beyond the windshield (rust, electrical damage, mold remediation), you can pursue a claim for the full cost of repairs.
Your insurance company may also help. If the original installation was done through an insurance-approved vendor, file a complaint with your insurance company. They have leverage with preferred vendors and may pressure the glass company to fix the problem.
| Step | Action | Timeline |
|---|---|---|
| 1 | Document leak with photos and notes | Immediately |
| 2 | Contact glass company with documentation | Within 48 hours |
| 3 | Request warranty inspection and repair | Within 1 week |
| 4 | If refused, contact insurance company | Within 2 weeks |
| 5 | Obtain repair quotes for damage | Within 1 month |
| 6 | File small claims or escalate if necessary | Within 3 months |
A leaking windshield after replacement is frustrating, but it's almost always fixable. The key is identifying the problem quickly and documenting it thoroughly. Most windshield leaks are covered under warranty. Professional installation companies, including BL Auto Glass, stand behind their work with guarantees that cover workmanship defects. When you choose a reputable installer with a track record of quality work and a lifetime warranty, you protect yourself against these problems. If you're in Central Florida and need windshield replacement, contact BL Auto Glass to schedule a same-day appointment with technicians who handle insurance claims from start to finish, often resulting in $0 out of pocket for you.
=== FAQ ANSWERS (audit these too, same rules) ===
[1] Q: My windshield is leaking after replacement. What should I do? A: First, document the leak with photos of water damage inside your vehicle. Contact the installation company immediately and request an inspection. If the windshield was installed recently, the urethane adhesive may still be curing. However, if curing time has passed and water is entering the cabin, the installation likely failed. Check your warranty coverage, most professional installations include warranty protection against leaks caused by installation errors. Request a resealing or full replacement at no charge.
[2] Q: How long should I wait to drive after a windshield replacement? A: Drive-away time is typically 1 hour after installation, allowing basic handling of the vehicle. However, full curing of the urethane adhesive takes 24 hours. Avoid car washes, heavy rain exposure, and aggressive driving during the first 24 hours. Temperature affects curing speed, cold weather extends curing time. Even after the drive-away period, avoid slamming doors or applying pressure to the glass, as the bond continues to strengthen throughout the full curing period.
[3] Q: Can a leaking windshield be resealed, or does it need replacement? A: Minor leaks caused by incomplete sealant application can sometimes be resealed without full replacement. A technician can apply additional urethane around the frame to seal gaps. However, if the leak stems from improper installation, body seam failure, or structural damage to the pinch weld, resealing may not hold long-term. A professional inspection using leak detection methods will determine whether resealing is viable or if replacement is necessary for a lasting fix.
[4] Q: What are the signs of poor windshield installation? A: Look for water staining on the headliner, dashboard, or door panels, which indicates water intrusion. Visible gaps between the glass and frame, uneven sealant bead, or adhesive drips are red flags. Wind noise around the windshield suggests an improper seal. Interior dampness, musty odors, or mold growth point to ongoing moisture problems. If these symptoms appear within days of installation, the technician likely failed to apply sufficient sealant or prepare the surface correctly.
Frequently Asked Questions
My windshield is leaking after replacement. What should I do?
First, document the leak with photos of water damage inside your vehicle. Contact the installation company immediately and request an inspection. If the windshield was installed recently, the urethane adhesive may still be curing. However, if curing time has passed and water is entering the cabin, the installation likely failed. Check your warranty coverage, most professional installations include warranty protection against leaks caused by installation errors. Request a resealing or full replacement at no charge.
How long should I wait to drive after a windshield replacement?
Drive-away time is typically 1 hour after installation, allowing basic handling of the vehicle. However, full curing of the urethane adhesive takes 24 hours. Avoid car washes, heavy rain exposure, and aggressive driving during the first 24 hours. Temperature affects curing speed, cold weather extends curing time. Even after the drive-away period, avoid slamming doors or applying pressure to the glass, as the bond continues to strengthen throughout the full curing period.
Can a leaking windshield be resealed, or does it need replacement?
Minor leaks caused by incomplete sealant application can sometimes be resealed without full replacement. A technician can apply additional urethane around the frame to seal gaps. However, if the leak stems from improper installation, body seam failure, or structural damage to the pinch weld, resealing may not hold long-term. A professional inspection using leak detection methods will determine whether resealing is viable or if replacement is necessary for a lasting fix.
What are the signs of poor windshield installation?
Look for water staining on the headliner, dashboard, or door panels, which indicates water intrusion. Visible gaps between the glass and frame, uneven sealant bead, or adhesive drips are red flags. Wind noise around the windshield suggests an improper seal. Interior dampness, musty odors, or mold growth point to ongoing moisture problems. If these symptoms appear within days of installation, the technician likely failed to apply sufficient sealant or prepare the surface correctly.
This article was written using GrandRanker