
 how-to
How to Identify Poor Windshield Installation: 7 Warning Signs
Table of Contents
- 7 Warning Signs of Poor Windshield Installation
- Signs of Windshield Air Leaks You Should Never Ignore
- Why Windshield Adhesive Curing Time Matters for Safety
- The Pinch Weld: The Hidden Foundation of a Safe Windshield
- ADAS Camera Recalibration Importance After Replacement
- DIY vs. Professional Verification: What You Can Check Yourself
- Your Legal and Insurance Recourse for a Bad Installation
- Frequently Asked Questions
Last Updated: September 14, 2026
7 Warning Signs of Poor Windshield Installation
Identifying poor windshield installation starts with knowing what a correct one looks like: glass flush against the body, a continuous urethane bond, and trim that lines up evenly. When any of those fails, you get predictable symptoms. This guide from BL Auto Glass covers the seven warning signs we see most often, plus the safety checks most drivers never run.
A windshield is a structural component, not a window. It braces the roof in a rollover and gives the passenger airbag a surface to push against. The federal safety standard that governs auto glass, Federal Motor Vehicle Safety Standard No. 205, exists because a windshield that separates from its frame stops doing that job. Warning signs matter because the failure is usually invisible until it isn't.
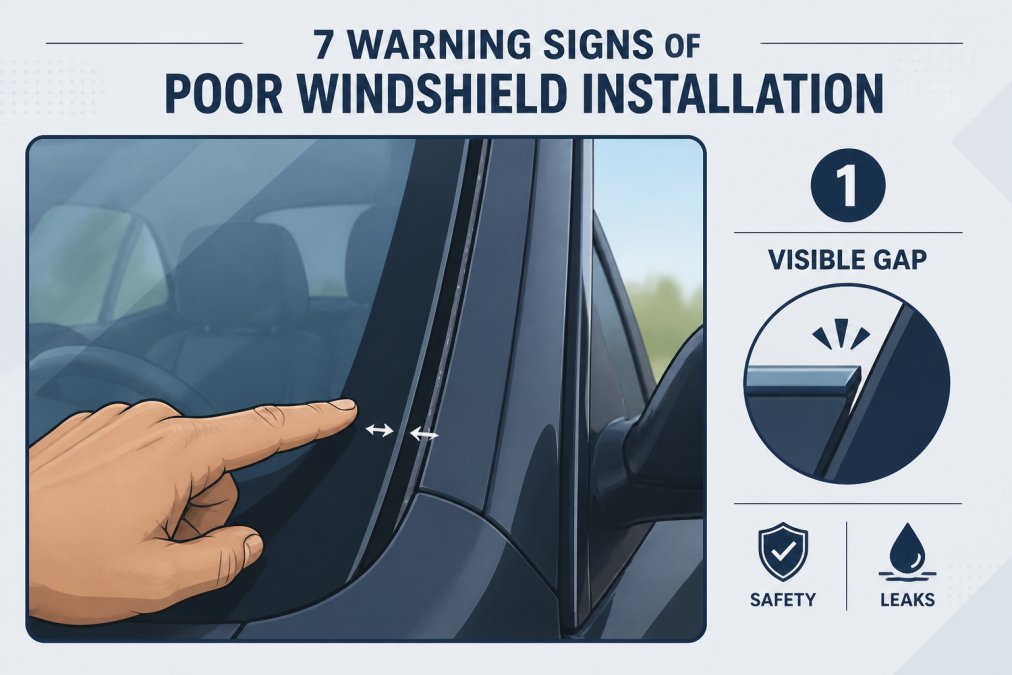
1. Visible Gaps and Misaligned Trim
Run a finger along the edge where the glass meets the body. A properly set windshield sits in a uniform channel with even spacing all the way around. Gaps that widen at one corner, or trim proud on one side and recessed on the other, point to glass set off-center, often the first clue the technician rushed the positioning step.
2. Wind Noise and Air Whistling
Wind noise that appears only after a replacement is a classic sign of a compromised seal. At highway speed, air pushes through any break in the urethane bead, producing a whistle or low hum near the top corners or base of the glass. A common mistake is blaming the weatherstripping when the real problem is a void in the adhesive line underneath.
3. Water Leaks and Moisture Intrusion
Water pooling on the dashboard or a damp headliner after rain signals moisture intrusion through the seal. Leaks rarely announce themselves immediately; they show up weeks later as fogged interior glass, a musty smell, or cowl panel corrosion. Left alone, trapped water accelerates rust around the pinch weld, far more expensive to fix than a reseal.
4. Loose or Rattling Molding
Molding that lifts at a corner or rattles over bumps means the trim clips were reused, broken, or skipped. Moldings are not decorative: they channel water away from the adhesive and shield the bond line from UV exposure. A loose molding lets water sit against the urethane, shortening the life of the seal.
5. Distorted or Wavy Glass
From the driver's seat, look through the windshield at a straight vertical edge, like a building corner or light pole. If the line bends or ripples as you move your head, the glass has optical distortion. Common with low-grade aftermarket glass, it matters more than most drivers realize: distorted edge vision can slow your reaction to a pedestrian or cyclist entering your field of view.
6. Adhesive Residue and Messy Sealant
Excess urethane squeezed out around the glass, smeared on the trim, or visible through the gap signals sloppy application. A clean installation shows a thin, even bead line with no overflow. Dashboard residue, glue on the cowl panel, or fingerprints baked into the sealant all point to a technician who did not mask or clean up properly.
7. Dashboard Residue or Interior Damage
Scratches on the dashboard, a cracked cowl panel, or a damaged A-pillar cover are collateral damage from a careless install. They are cosmetic, but a reliable proxy for the invisible work: if the visible steps were rushed, the adhesive bond underneath probably was too.
Signs of Windshield Air Leaks You Should Never Ignore
Air leaks show up as a whistle, hiss, or low vibration that changes with vehicle speed. The tell is timing: if the noise started the day after a replacement, the installation is the cause. A seal that lets air through lets water through too, the same void in the urethane bead that whistles in dry weather becomes a leak point in the first heavy storm.
What separates a harmless noise from a structural warning is where the air escapes. Air slipping past the molding is usually a trim-clip problem. Air slipping past the urethane bead itself means the adhesive line has a gap, a void, a skip, or a bead laid too thin. That second kind matters, because the urethane is the only thing holding the glass to the pinch weld.
A quick test: tape over the suspect area with painter's tape and drive the same route. If the noise stops, you have found the leak path. Do not leave the tape on long-term, it is a diagnostic, not a fix. It tells you where air enters, not whether the bond underneath is compromised; a leak that disappears under tape can still sit on top of a failing adhesive line.
Air leaks deserve attention because the problem is structural. The urethane adhesive holding the glass in place is the same barrier keeping water out. Moisture against the pinch weld is where rust begins, and rust there is the one failure mode that can turn a reseal into a full glass-and-body repair. If you can hear the leak, assume water can reach the same path, get the bond line inspected before storm season.
Why Windshield Adhesive Curing Time Matters for Safety
Windshield adhesive curing time is the window during which urethane transitions from a wet bead to a structural bond, the single most violated step in auto glass work. Fresh urethane needs time and specific temperature and humidity conditions to reach full strength, and driving before it does can shift the glass in its channel.
Here is what that means in practice:
- The vehicle should stay parked for the cure window the adhesive manufacturer specifies, not the window that fits your schedule.
- Cold or humid conditions extend cure time; a technician who does not account for that is cutting corners.
- The safest practice is to follow the adhesive maker's published drive-away time, which is typically longer than most customers expect.
Ask the shop what drive-away time they used and why. A straight answer tells you they tracked it. A vague one tells you they did not.
The Pinch Weld: The Hidden Foundation of a Safe Windshield
The pinch weld is the raised metal lip around the windshield opening where the urethane adhesive bonds to the body. It is the foundation the entire installation rests on, and the part you can never see once the glass is set.
Two things go wrong at the pinch weld. First, technicians skip the primer or surface prep, so the adhesive never bonds properly to bare metal. Second, existing rust gets covered over instead of treated. Both create a weak bond that can fail in a crash, exactly when the windshield should be holding the roof up and giving the airbag something to push against.
Rust prevention at the pinch weld is not optional maintenance. It is the difference between a windshield that stays put and one that does not.
ADAS Camera Recalibration Importance After Replacement
ADAS camera recalibration importance comes down to one fact: the forward-facing camera behind your windshield is aimed by the glass, so a new windshield changes its aim. Lane-keeping assist, automatic emergency braking, and adaptive cruise control all depend on that camera reading the road correctly.
Recalibration realigns the camera to the vehicle's actual driving axis, either statically (targets at measured distances in a controlled space) or dynamically (driving under specific conditions). Either way, it must happen after the new glass is in and the adhesive has cured.
Skip it and the systems may still appear to work while quietly misjudging distance and lane position. That is a safety problem, not a convenience one. BL Auto Glass includes camera recalibration when a vehicle needs it, so the safety systems are verified before the car goes back on the road.
DIY vs. Professional Verification: What You Can Check Yourself
You can verify the visible work yourself in about ten minutes. The hidden work, what determines whether the windshield stays in during a crash, requires a technician's tools and training. The useful skill is knowing which findings are cosmetic noise and which are red flags worth a professional inspection.
What you can check, and what each result means:
- Walk the perimeter of the glass and look for even gaps and flush trim. A gap that widens at one corner is a positioning red flag; a uniform gap slightly wider than the opposite side is usually within tolerance.
- Press gently on the molding at each corner to confirm it is seated. A corner that lifts with light pressure is a trim-clip issue, cosmetic, but a sign the technician reused clips.
- Run water from a hose along the top edge and watch the interior for drips. Any drip inside the cabin is a red flag, full stop. Water reaching the interior means the urethane bead has a path through it.
- Drive at highway speed with the radio off and listen for new wind noise. Noise that started the day after replacement and changes with speed is a red flag; noise present before the replacement is not the installer's problem.
- Look through the glass at a straight edge for distortion. Waviness at the edges is a red flag for optical quality; a slight center ripple is rare and usually a glass defect, not an installation defect.
What needs a professional, and why DIY cannot substitute:
- Adhesive bond integrity at the pinch weld. This requires pulling the trim and inspecting the bead line directly. A visual check from outside tells you nothing about whether the urethane bonded to bare metal or was laid over rust, dust, or old adhesive.
- Urethane cure verification and drive-away time confirmation. Cure depends on temperature and humidity; the only reliable check is the adhesive manufacturer's published data against the conditions at install.
- ADAS recalibration. The forward-facing camera behind the windshield is aimed by the glass. After a replacement, lane-keeping assist, automatic emergency braking, and adaptive cruise control can appear to work while quietly misjudging distance and lane position. Recalibration needs target boards, a level surface, and a scan tool, none of which a driveway inspection can replicate.
The honest trade-off: the ten-minute check is worth doing because it catches sloppy jobs early, while the shop still owns the problem. But it is a screening tool, not a verification. The pinch weld and the camera are where a bad installation hides, and neither shows up in a walk-around.
Your Legal and Insurance Recourse for a Bad Installation
If a shop botched the job, your options start with documentation. Photograph the gaps, residue, and any water damage. Save the invoice, which should list the adhesive used and the drive-away time. Then contact the shop in writing and give them a chance to correct it.
Most states license auto glass work, and state consumer protection offices handle complaints against licensed businesses. Your insurer also has standing here: if they paid the claim, they have an interest in the work being done correctly, and many will pressure the shop or help you file a supplement. Review your state's insurance department guidance on claim disputes if the shop refuses to make it right.
Under Florida law, drivers with comprehensive coverage often qualify for $0 deductible windshield replacement, which means the insurer is the payer and the shop answers to them. That is use. Use it.
A bad windshield installation is a safety defect, not a cosmetic annoyance, and the signs are usually there if you know where to look. If you have spotted gaps, new wind noise, water intrusion, or you are unsure whether the last replacement was done right, BL Auto Glass can inspect it. We handle your insurance claim from start to finish, include camera recalibration when your vehicle needs it, offer free mobile service and same-day appointments, and back every installation with a lifetime warranty. Book now with BL Auto Glass and get your windshield verified by a technician who will show you exactly what they checked.
Frequently Asked Questions
How can I tell if my windshield was installed incorrectly?
Check for visible gaps between the glass and trim, wind noise at highway speeds, water leaks after rain or car washes, and rattling molding. Run your hand along the edges to feel for uneven surfaces. If you notice any of these signs, have a certified auto glass technician inspect the installation. Poor windshield installation can compromise structural integrity and airbag deployment in a crash.
Should I hear wind noise after a windshield replacement?
No. A properly installed windshield should seal completely, with no air whistle or wind noise at any speed. Wind noise after replacement is one of the clearest signs of windshield air leaks, usually caused by gaps in the urethane adhesive or misaligned trim. If you hear whistling, return to the installer or get a second opinion from a technician who can test the seal.
How long should I wait to drive after a windshield replacement?
Windshield adhesive curing time depends on the urethane product and weather conditions. Most manufacturers specify a safe drive-away time of one hour, but full curing can take 24 hours or longer. In humid or cold conditions, curing takes longer. Driving too soon risks the windshield shifting, which weakens the bond and creates leaks. Ask your installer for their specific safe drive-away time.
Why is camera recalibration necessary after windshield replacement?
ADAS camera recalibration importance comes down to safety. Lane-keeping assist, automatic emergency braking, and adaptive cruise control rely on cameras mounted to the windshield. When glass is replaced, even a millimeter of change in camera angle can throw off these systems. Recalibration restores proper alignment. Without it, safety features may fail or give false warnings. Always confirm recalibration is included in your replacement.